Learn how to create custom business cards using our free templates. BugxPress supports do-it-yourself design.
Step 1: Pick a product
Begin by creating an account, or navigating to the Business Card page on our site. Select full color or black and white cards.
On the product page, choose project title and fill out your printing options. Check that 'Design Online' option is selected, then click Continue.

Step 2: Pick a template
Under Template Selection, click Business Cards. Any available templates will appear with previews. Click a design you'd like to start editing (e.g. BC03) and a customization window will appear.

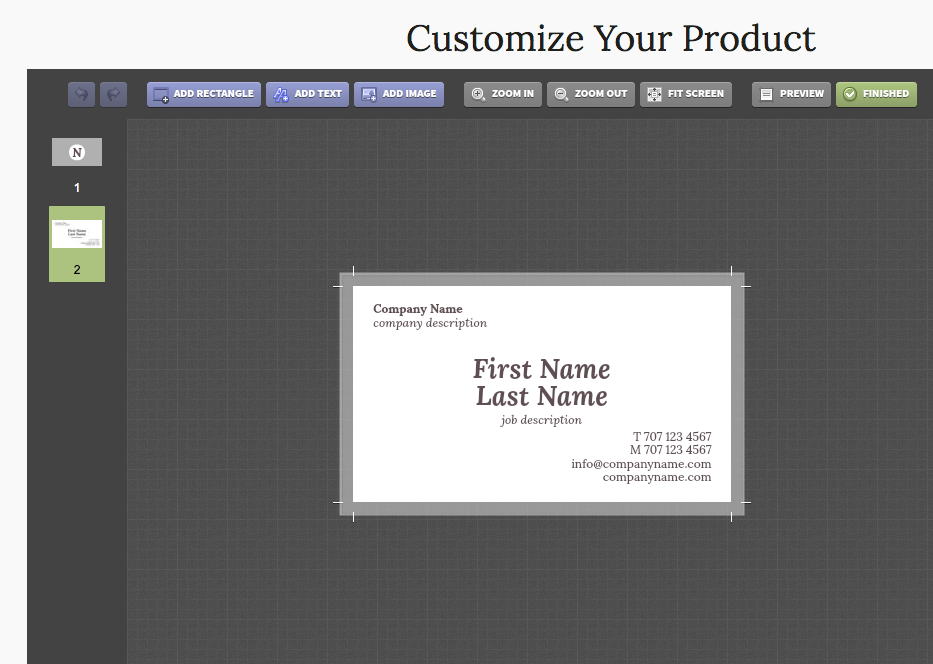
Step 3: Edit your card
Editing your business card is simple, the templates come pre-formatted. For the quickest card creation, just enter your details where prompted.
View either side of the card by clicking on the page icons in left-hand sidebar (Your edits will be saved as you navigate between pages).
Step 4: Change background colors
Change the background color by clicking the large rectangle and then the Edit button that appears. Navigate to Fill and choose your desired color.
For colors other than those listed, enter the corresponding six digit HTML color code (Example format: 0x123456). Click Done in the bottom right corner when you are finished.

Step 5: Editing text
Enter your content by hovering over desired text and clicking Edit. This opens the Edit Text box which allows changing the font, size, color, and alignment of your text. If you'd only like to change part of the text, simply highlight just that portion.
For other adjustments like letter spacing and rotation, click Open Advanced Options.

To add special characters like copyright symbols, click where you'd like character to go, then navigate to Options, select the G, and a list of available glyphs for your chosen typeface will appear.

Note: Sometimes when changing the font, it may no longer properly fit in the text box. A red + may appear, or parts of the text will end up on separate lines. Hover over the text until the Scale symbol appears in the bottom right corner. This will allow you to enlarge the text box by clicking and dragging. Reposition the text when finished.

Step 6: Delete existing content
To delete an element, hover, then select the X in the left-hand corner.

Note: If you delete an element by mistake, clicking the back arrow in the top left corner will undo the change. This feature stores all changes to the document, so you may use it repeatedly to go back as well as forward.

Step 7: Add your own image
To upload your own logo/image, click the Add Image button. Navigate to your desired file and select Upload. Accepted files are JPEG, PNG, and PDF. For best results, choose a high-resolution image that is at least 300 ppi (pixels per inch).
A PNG or PDF file that supports transparency is recommended if you'd like the card background color to show through (Example: logos or art with a solid white background).

Move the image by clicking and dragging. To adjust, click Edit. If you'd like to change the image size, be sure that Maintain Aspect Ratio is checked. This ensures that your image will not become distorted when resizing.
Click out of the Edit Image box. Adjust the size by hovering over bottom right corner. When Scale appears, click and drag to size image appropriately.

Step 8: Review your design
When satisfied with your design, click Preview in the upper right corner. Review both sides before continuing, verifying that all information submitted is correct.


After previewing your business card, make desired changes, then select Finished. Your card should now be added to your shopping cart.